These silo photos were taken at the training silo, located at Ellsworth
Airbase. This is within the base, and can only be seen by taking the bus
tour, which loads at the entrance to the South Dakota Air and Space Museum.
As of this writing, museum entry is free; but the bus tour is $6.00. It is
worth the cost, and I recommend it. Our tour was led by a man who had served
in the Air Force, and was informative, and quite a bit of fun. The high point
of the tour was the entry into the missile silo.The South Dakota Air and
Space Museum is located off of exit 67, on Interstate 90. This is about an
hour drive from Minuteman Missile NHS.
|
|
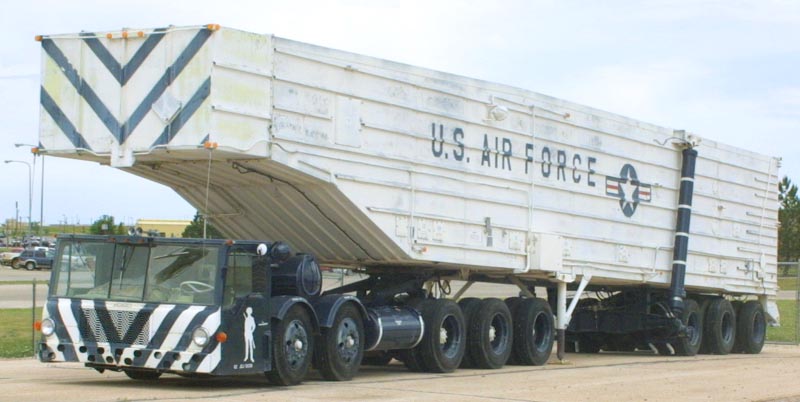
This is how you get a Minuteman missile into it's
silo. This is a missile erector, and it is used to transport and install
the Minuteman missile. The trailer of the truck is designed to rise up,
like the bed of a dump truck. The missile is then lowered down on cables.
This transporter only delivers the missile itself; there is no warhead carried.
The warhead is installed separately.
|
|
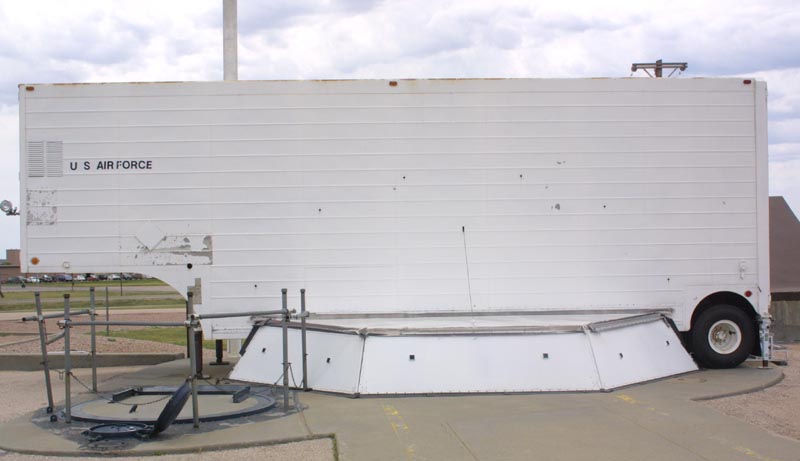
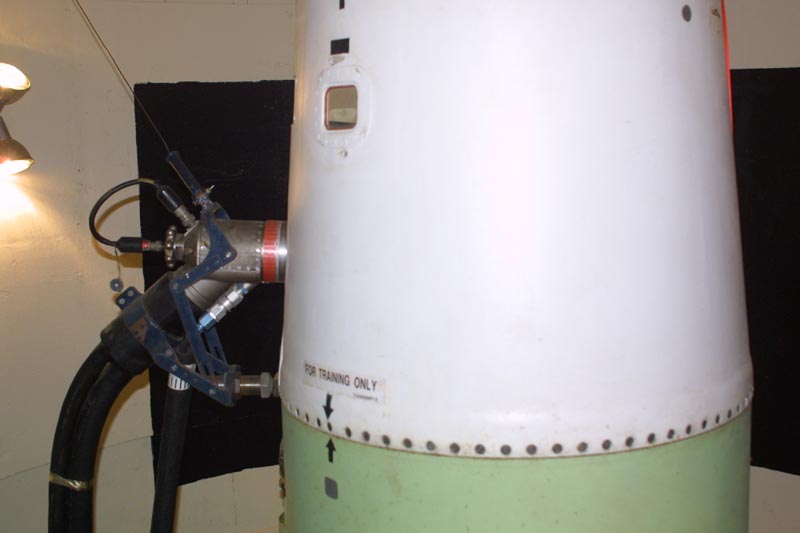
This is the training silo at Ellsworth Air
base. It is a standard, functional silo; but contains a training missile,
and has this warhead installation truck, parked permanently overhead. The
only major difference between this silo, and the silos out in the missile
fields, is that there is a stairway leading down to a hole cut in the side,
for easier access. The standard entrance hatchway, is visible to the lower
left of the photo.
|
|
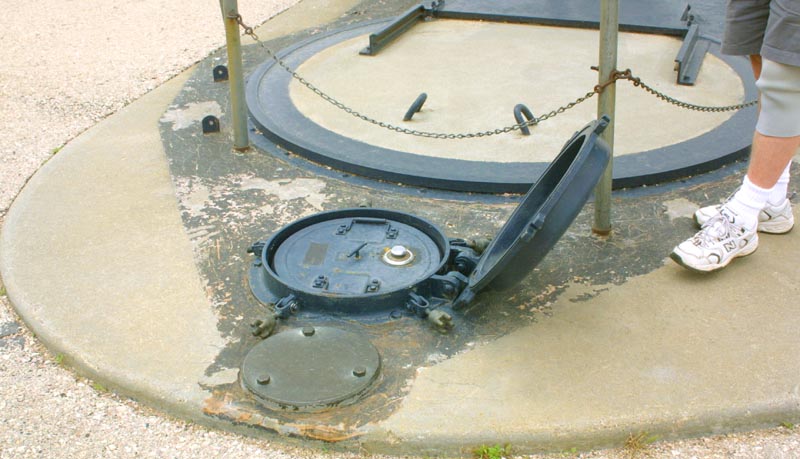
The entrance to the silo. The standard
procedure, for maintenance, was to send two teams out. The first team would
have the combination to this door. Once the correct combination is set, the
door pulls straight out, to reveal another door underneath. The second team
has the combination to the second door. Under the second safe door, are
the controls to open the hatch. The hatch is blocked by a hydraulically controlled
plug of concrete, which weighs five tons. The block lowers, when the controls
open the door.
|
|
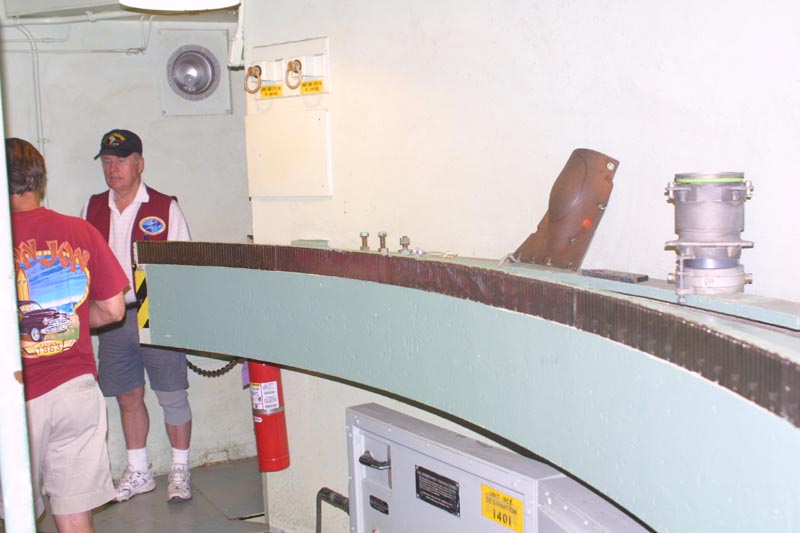
The upper level of the equipment room consists
of a steel framed platform covered with a rolled steel deck plate. Cast
into the east outer wall is a narrow, steel faced bench, calibrated with
compass bearings. The bench originally supported an "autocollimator"
that was used to align the missile's guidance system. Directly above
the bench is a canted cylindrical porthole with bulletproof glass, that
is now welded shut. This sight tube is aligned to point through
the open access hatch, which allowed technicians to establish visual references
to a pair of azimuth markers located on the surface outside of the security
fence.
|
|
This is the side of the training missile. The
little mirror on the side, was used in conjunction with the navigation bench
shown above. This allowed the missile navigation system to sight to the benchmarks
outside, and thus determine it's position. The large connection towards
the left of the photo is not a fuel line. These are solid fuel rockets.
This line contains electrical and command circuit connections. It also allows
the missiles to be reprogrammed, for hitting different targets.
|
|
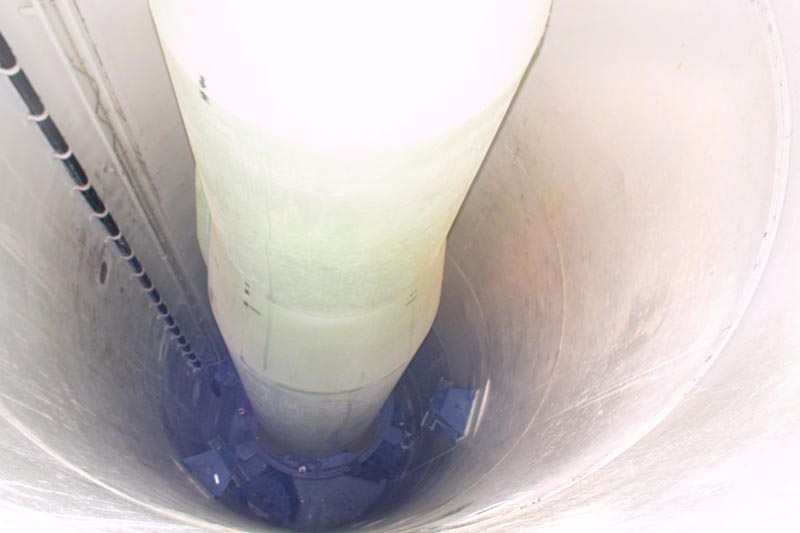
A look down the silo. At the bottom is a shock
mounting system, to protect the missile in case of a nearby nuclear detonation.
In service since 1965, the Minuteman II was a three stage, solid
propellant, intercontinental ballistic missile. Because solid propellant
is so stable in storage, the missile can be stored almost indefinitely
and yet be ready to launch on short notice. This ICBM had a range of
over 7,000 nautical miles and carried a single nuclear warhead. 450 missiles
were fielded at one time. Today, the Minuteman II has been decommissioned
and the missiles disassembled.
|
|
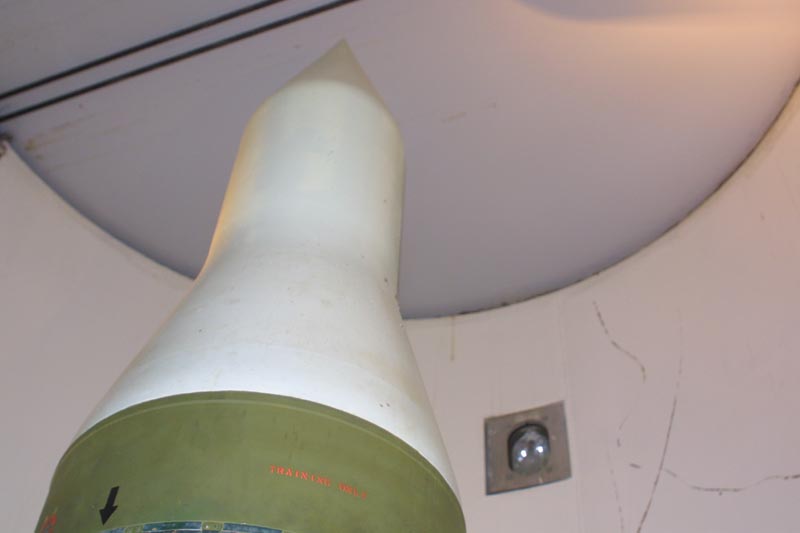
A look at the top of the missile, and at the
inside of the silo cover. These missiles carried W-56 warheads, with a
yield of 1.2 megatons. To put things in perspective, the Hiroshima bomb
had a yield of 12.5 kilotons, making the W-56 about 100 times more powerful.
|
|
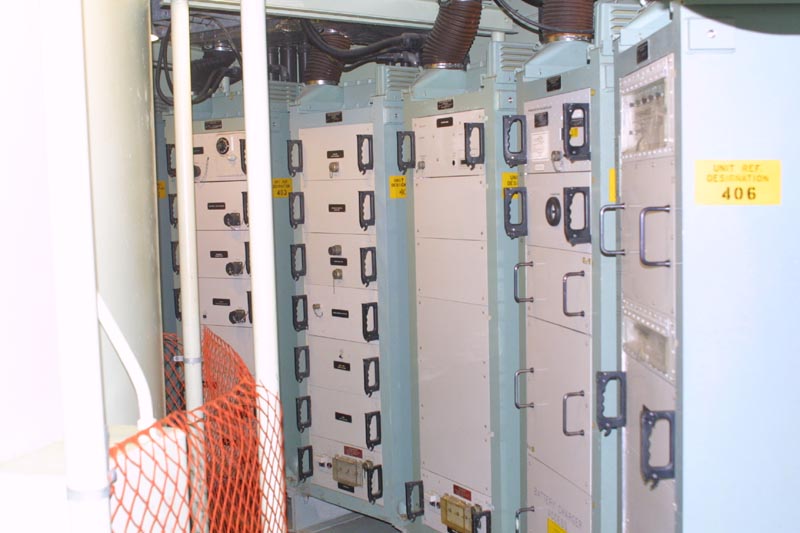
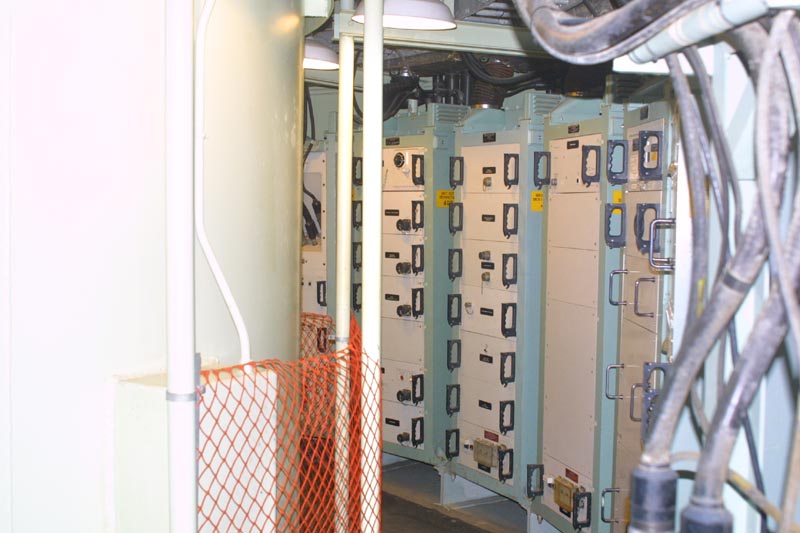
Some of the equipment racks which line the walls
of the service room. This is a circular room, which girds the top of the
silo, like a donut around the top of a Coke bottle.
|
|
Another look at the electronics racks in the
service room. To the left of the photo can be seen the wall of the silo
itself. The silo wall has several openings to allow observation, and servicing
of the missile.
|
|
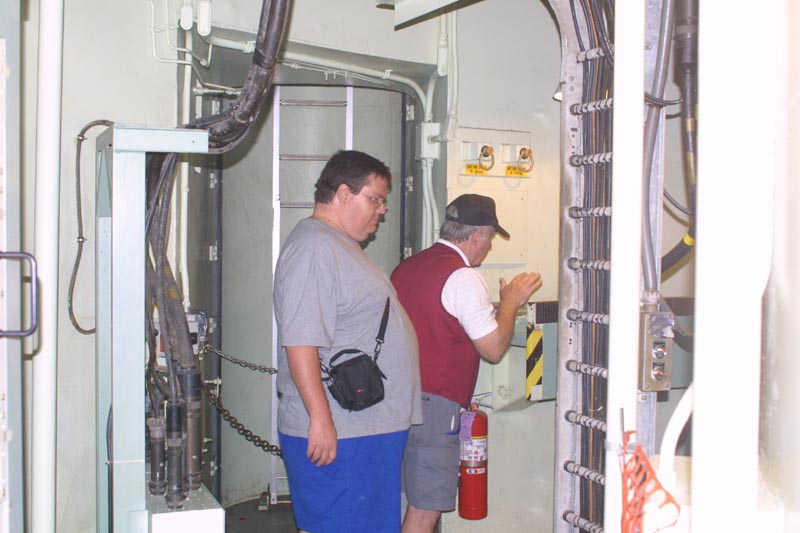
The ladder near the center of the photo is the
normal entrance. Once the outside entry hatch is open, and the five ton
concrete plug drops, missile techs would descend the ladder, do their work,
and then leave. The security team, which has the combination to the first
safe door, remains on the surface to guard the opening. The security team
does not enter the silo at all.
|
|
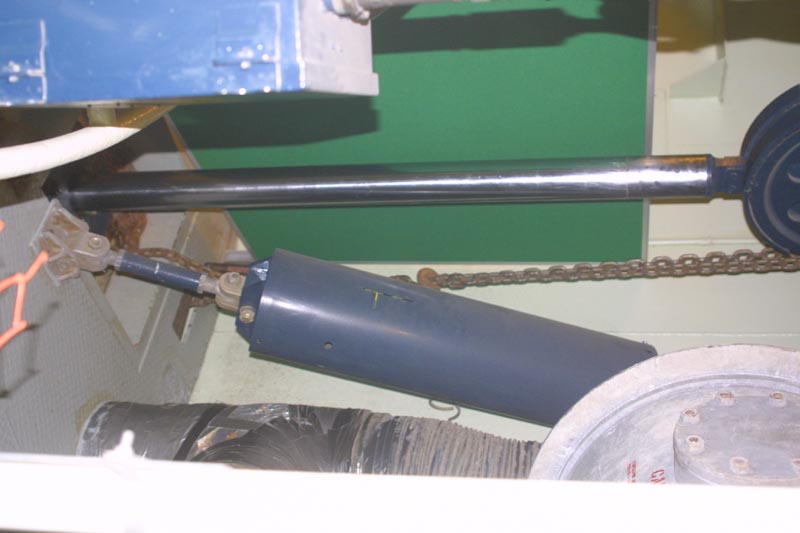
This is the hydraulic ram, which flings
the heavy silo cover off, and allows the missile to be launched.
|
|
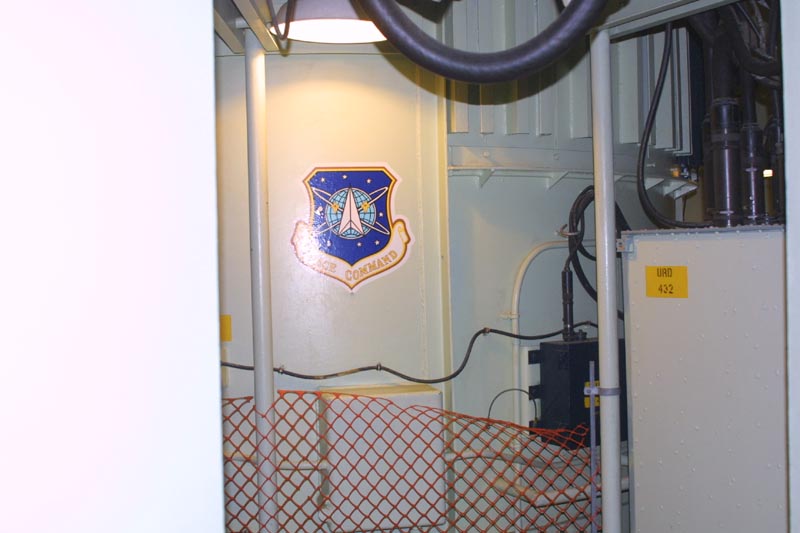
One last shot of the silo wall, from the training
entrance. The Minuteman force is no longer a part of SAC, which ceased
to exist in 1992. These missiles are capable of putting objects into orbit
around the Earth, so the missile force is now considered to be a part of
Space Command.
|
|
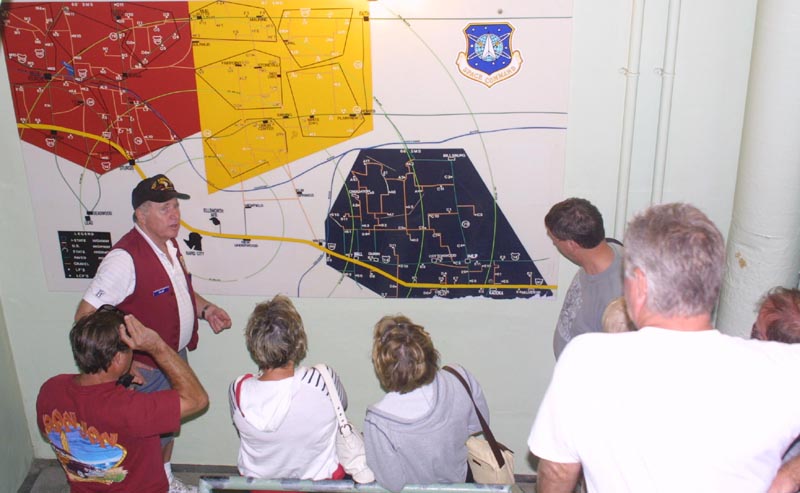
At the bottom of the stairs leading to the training
silo. The wall is decorated with maps of the Ellsworth missile fields.
The blue field on the lower portion of the map, is the delta field. This
is the field that contains the two elements that were preserved for the
Minuteman NHS.
|
|
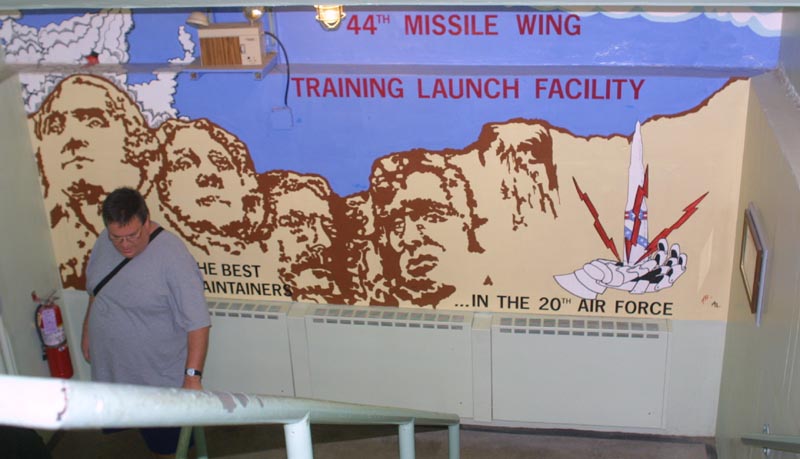
The upper landing to the training stairs. As with
many military facilities, the personal were encouraged to decorate, and
personalize the area.
|